PROJECT: Proj_8_UV_Texture
Applying Materials w/ Lambert
*we already discussed this
– Right click on individual faces (or a select multiple faces) and choose Assign Favorite Material. Choose Lambert, Click on the Color option and pick your color. Make sure to rename the Lambert as well
Projected Materials
Apply a new Lambert to a face, name the lambert ‘Table Top’
Open the Hypershade Window
Click on the checkered symbol next to the COLOR option and in the next window choose FILE and load the Table Top Image
Press 6 or the Textrued Button in the Viewport to see your materials
Now adjust the image’s projection
Click on the surface again, make sure you are choosing the Face
UV > Planar
This makes a new node/tab called PolyPlanarProj1
Adjus the Rotate Setting and put 90 in the first box (since we are applying it to a surface on the X axis.) and put 0 in the other boxes
Adjust the Width and Height w the sliders or by dragging
Use Image Scale to Flip the image by adding -1
Applying with another type of UV
Use the front viewport to select every Face except the top AND bottomof the box.
Create a new lambert, call it ‘Table_Side’
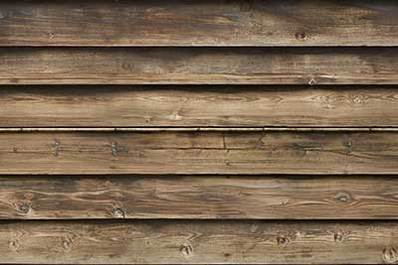
Click on the checkered symbol next to the COLOR option and in the next window choose FILE and load the TableSide Image
Select all those side faces again and go to
UV >Cylindrical
Adjust the Sweep and Height using the Sliders or by using the draggers
Using the UV Editor
Create a simple cube, Scale it up a bit and bring it up to the ground plane
Apply a new lambert to the cube, name it Carboard Box and load the Cardboard Box File through the Color option (same as above)
Open the UV Editor Window
Windows>Modeling>UV Editor or UV>UV Editor
You will see your image, and the outline of your object
We will now modify the projection.
Select the Cube, UV> Automatic
This will move the outline of your projection in the UV Editor
As you hover over faces you will see them highlight in the UV Editor
Hover over the outline that represents the top of your box.
In the UV Editor right click and choose SHELL
*a Shell is an individual surface for projection, some people call it an ‘island’
You can now use Move (Q) to move the shell to the desired placement
Do this so that your Shells match the structure of the image
Right Click and choose Shell and use the Rotate tools in the UV editor to get it to match the image direction
Use Q (move) and R (scale) to get it to match the image
To do more finite adjustments, Right click and choose UV and you can move the corner point of the UV
For your models
Create a New Lambert Layer for your model
Go to UV> Editor
and choose UV> Automatic
Now use Move and Scale to postion your UVs in a logical way.
Go back to your modeling View port, choose object Mode, select the Model.
Go back to UV Editor and then go to Polygons>UV snapshot
Add a name for this file under FILENAME, and then hit OK.
Go to Photoshop
Open this file in Photoshop.
Create a color fill layer underneath the UV layer.
Lock/Avoid painting on the UV layer.
Create a new layer and start painting and adding textures in photoshop!
Make a backup as a PSD
Turn off the top layer and save the file in PNG format
Go back to Maya and the Hypershade Editor
Find the Lambert layer you made for your object and load your latest PNG
*option
use Photoshop to open an obj file and paint inside of photoshop.
this is a more straightforward workflow because you don’t have to switch between programs
3D Paint Tool (EASIEST!)
Select your Object and add a new Lambert
Go to UV> Editor and the UV> Automatic
Go back to the Model, select Object mode and Select the Object
Go back to UV Editor and Choose Polygons>UV Snapshot
Save the file with a new name
Select the Object, Go to the Rendering Tab above your view port and click on the 3D Paint tool
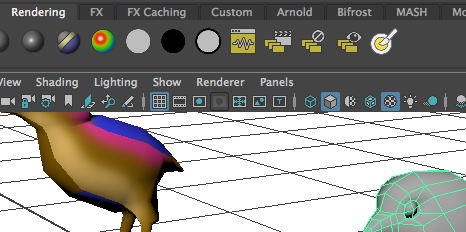
Double Click the tool to open its settings.
Go to File Textures > Attribute to Paint choose Color
Click on Assign/Edit Textures – Increase the pixel dimensions and choose a file type
Adjust the brush size
Go to File Textures> Save Textures to save your work
This file will be in the Source Images Folder>3dPaint Textures>
You could open this in photoshop and edit it and reuse it
*note- 3D paint seems to work better when your object is a combined and NOT made up of instances.
Models for practice:
Chicken
https://studentlaccd-my.sharepoint.com/personal/santosom_faculty_laccd_edu/_layouts/15/guestaccess.aspx?docid=17ec002cb8eab4a98ac219792d7f83dfa&authkey=AXlqUR6aqjW9ZiqMIcfaw5I&e=a3795cebf5b94d27950527ddce342571
Source images for practice:


Great Tutorial on UV Mapping (cardboard box method)