Proj_3_Thumbnails_and_Character_Design
Re-read the story your created. Share it with your friends and see if there are any areas where there is confusion of where something needs to be explained better or re-written. Think back to the story structure we talked about in our last class, does your story have a powerful arc/rhythm? Do you need to change and modify something. This is your foundation! Make sure it is strong.
Visualize the story. Now that you have edited and shared the story can you imagine it in your mind? Can you tell the story to a friend? What colors come to mind? What kind of style will it have (think of your favorite directors/movies). Start to dig in deeper with your imagination and visualize the story.
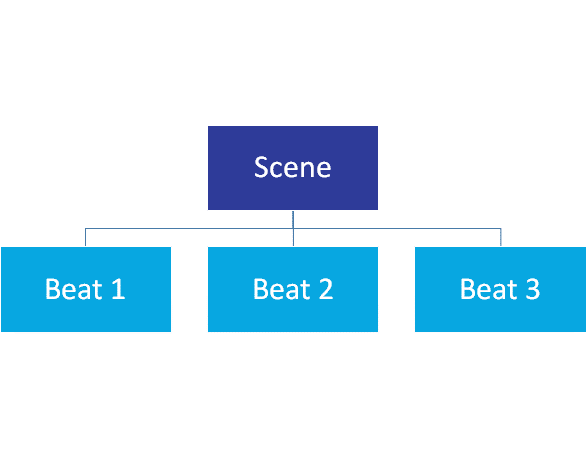
Break it Down into scenes or sequences. Decide on the different ‘places’ or ‘locations’ you will need in your story. If your story travels through time, how many different ‘times’ are there? Make a note of all the different ‘scenes’ you will need to draw.
Beats are the important parts of the story. For example in Star Wars, on Luke’s home planet there are a few important ‘beats’ when
*Luke purchases the androids
*Luke has a conversation with his parents about Obi Wan
*Luke travels to the bar to meet Han Solo
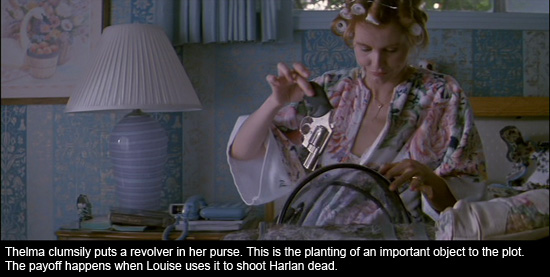
Prepare for the important moments in your story. If a prop is important in the story consider when and how it will appear. This is sometimes known as foreshadowing- where you set up a certain thing to happen (or a certain object to appear) early on in the story. For example if you main character is going to use a sword, make sure they have their sword on them from the beginning!
NOW ITS TIME TO DRAW!
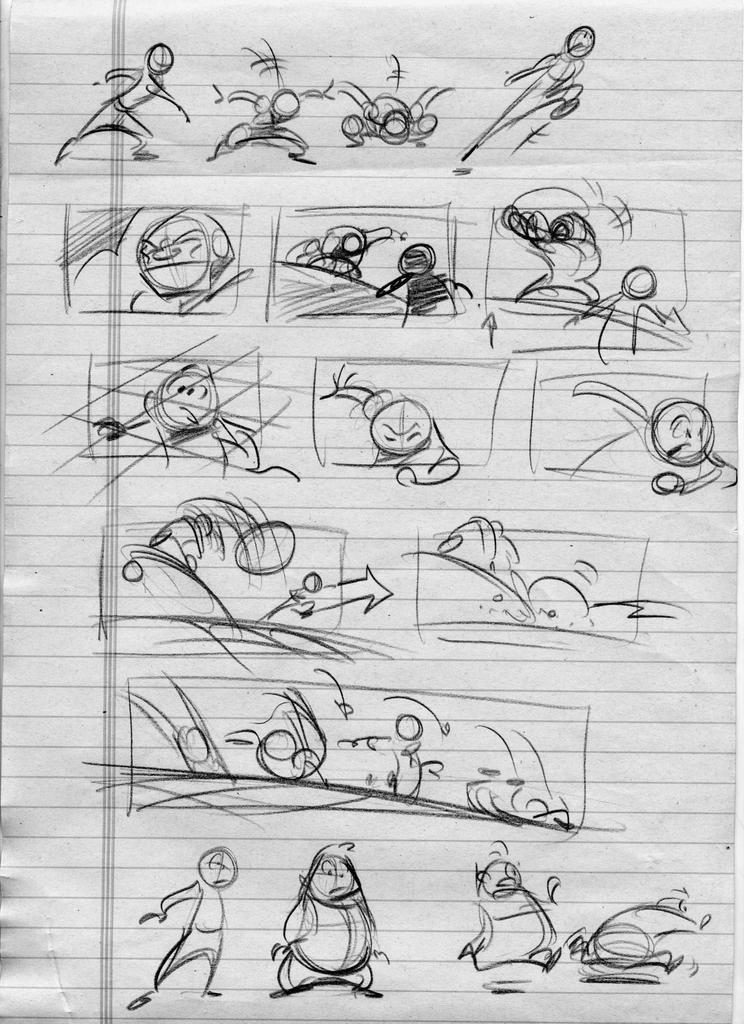
Thumbnailing
Rough, quickly drawn drawings, known as ‘thumbnails’ are the first step before you start creating the storyboard. You may want to start drawing your thumbnails on the same paper your story is written. Remember, these roughs are your experimental stage, its ok if they are messy and bad!
Keep thinking – What is the most important thing the audience needs to see? Experiment using thick markers, pencils. Work quick!
You may want to transfer them to POST-IT notes or fold your paper into small squares to help you organize your drawing. DON’T clean up these drawings, just keep going!
Here are some steps to get started:
Deadlines- In a production there are always deadlines. It is important to keep this in mind because in the production world time = money! For our class you are playing the role of producer and artist and director. Give your self a deadline of 1 week to get your rough thumbnails in order. These should be done QUICKLY and don’t worry to much about DETAIL. Just get it done! These rough drawings will be useful so you can see the pacing of your story and edit and add drawings where you need them to make your story stronger.
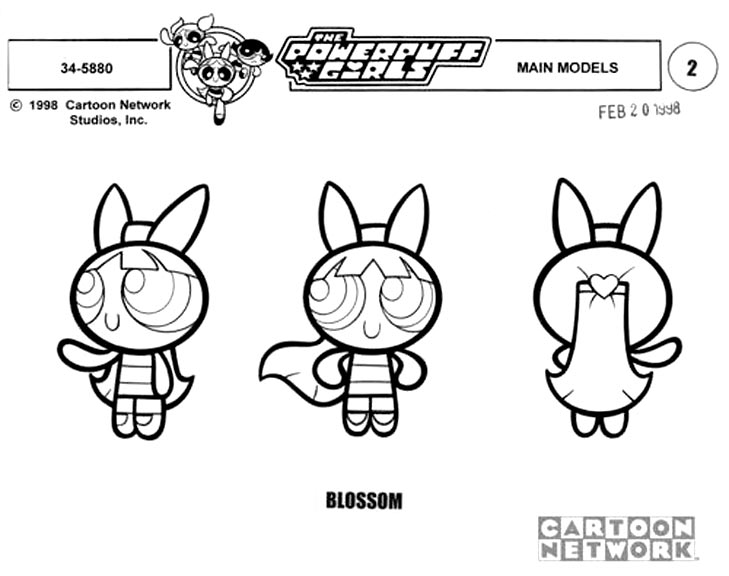
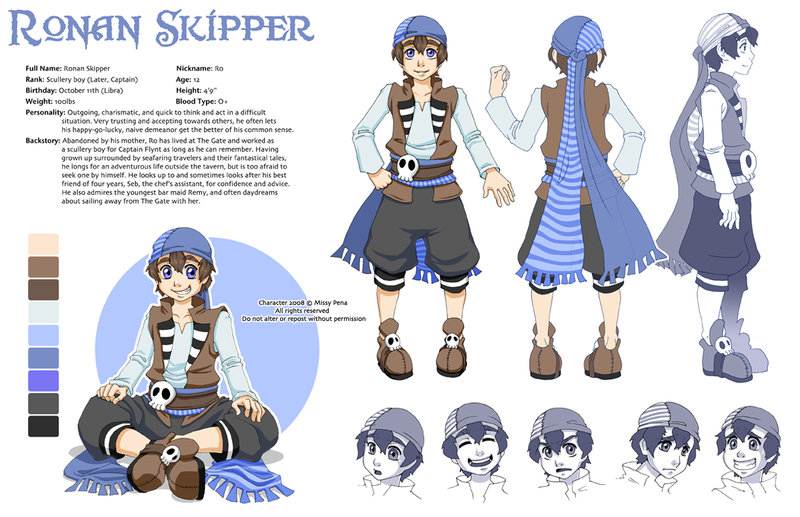
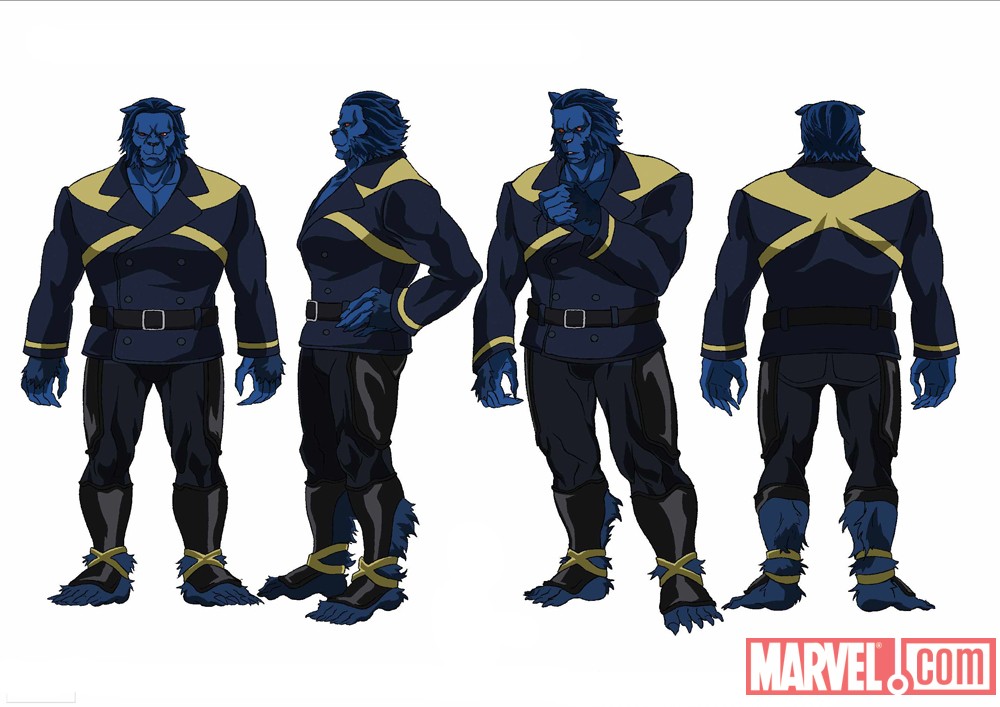
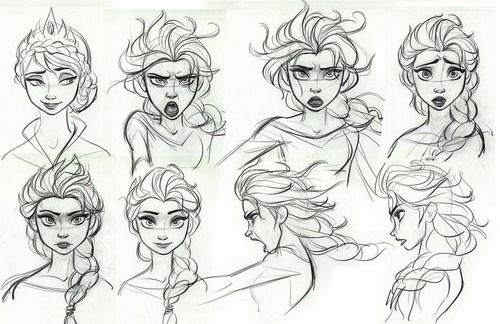
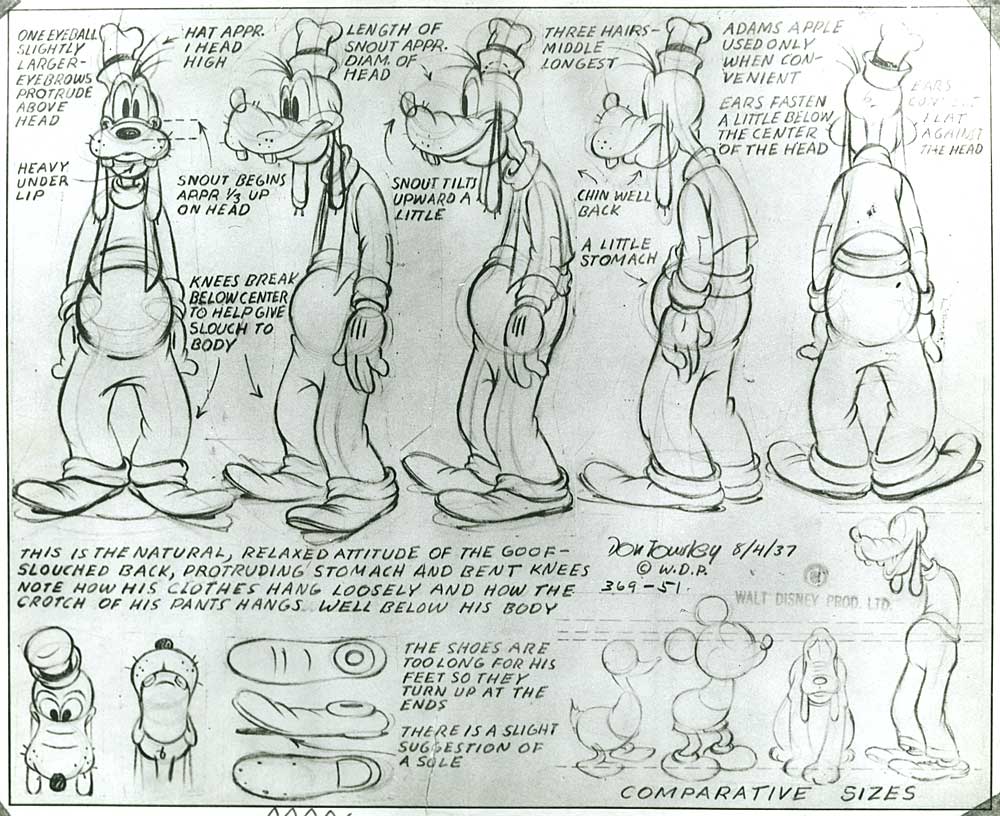
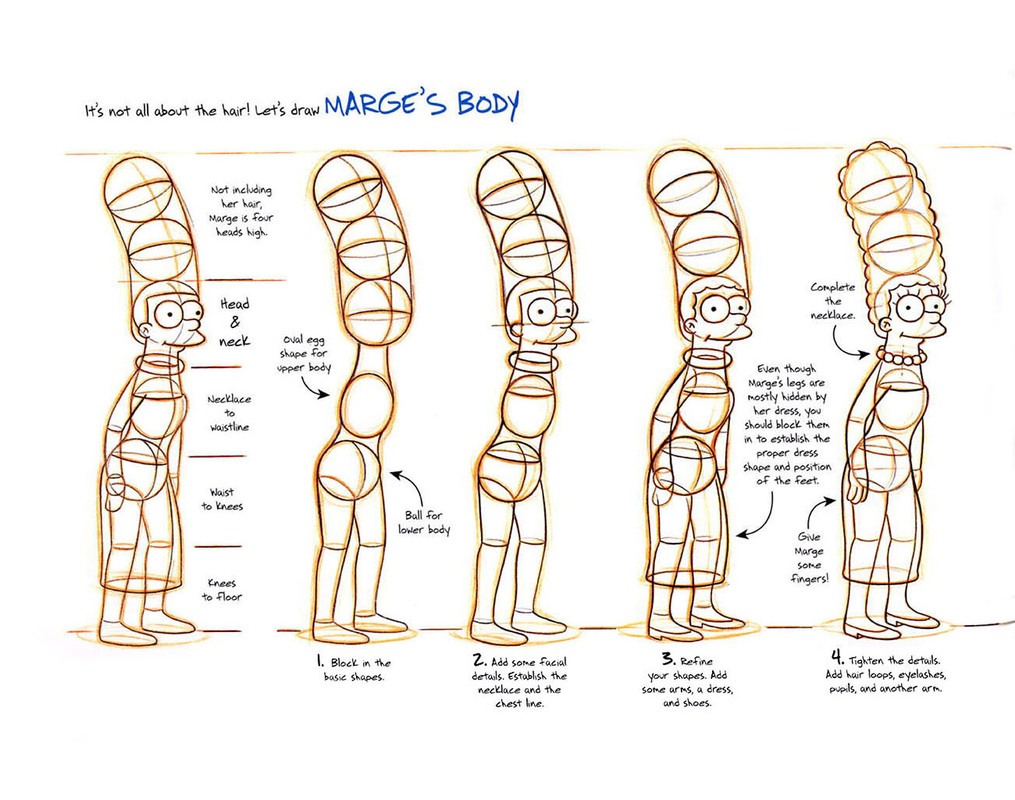
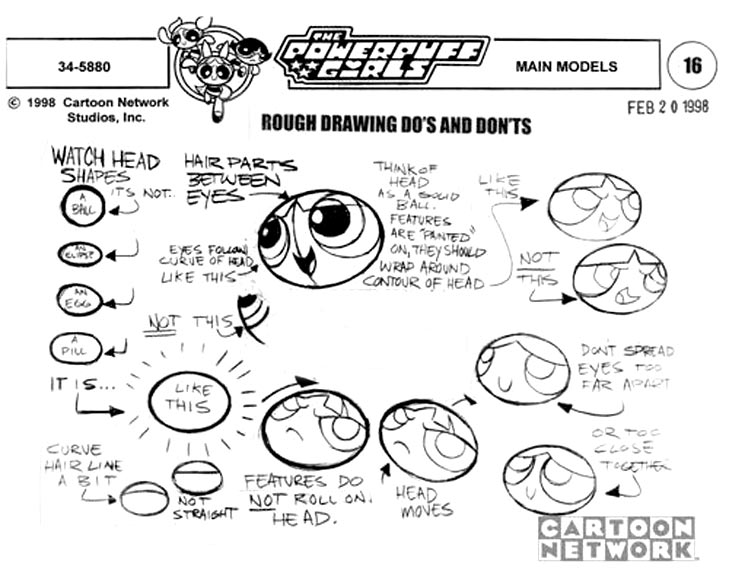
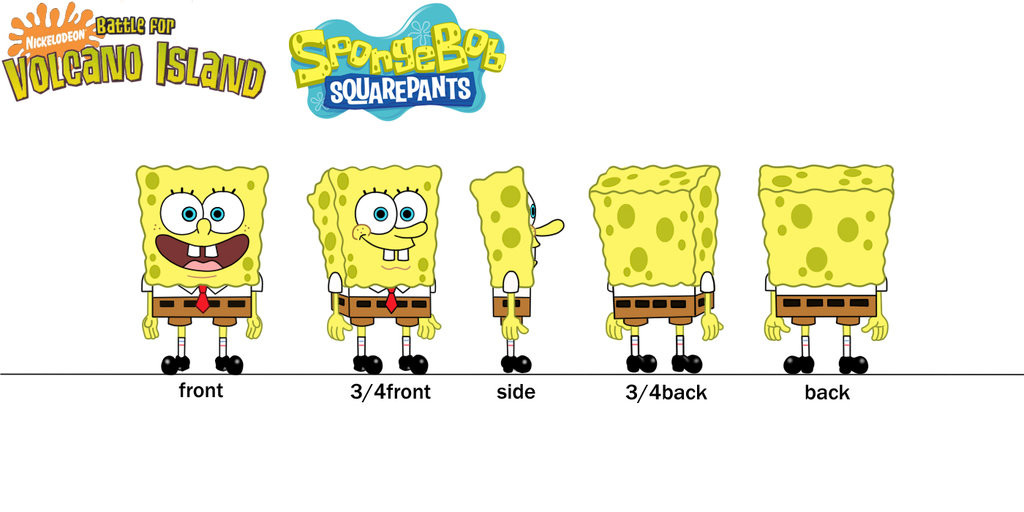
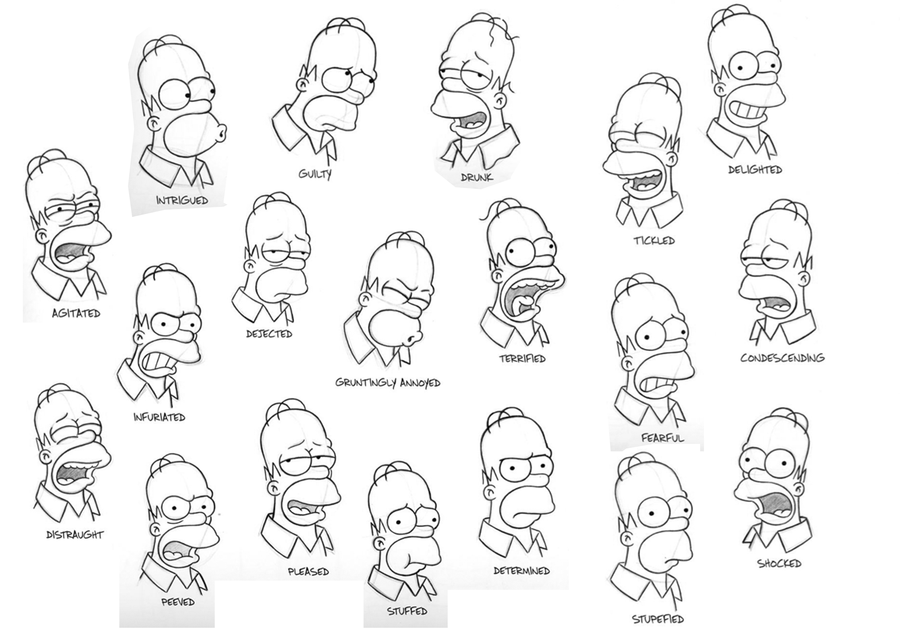
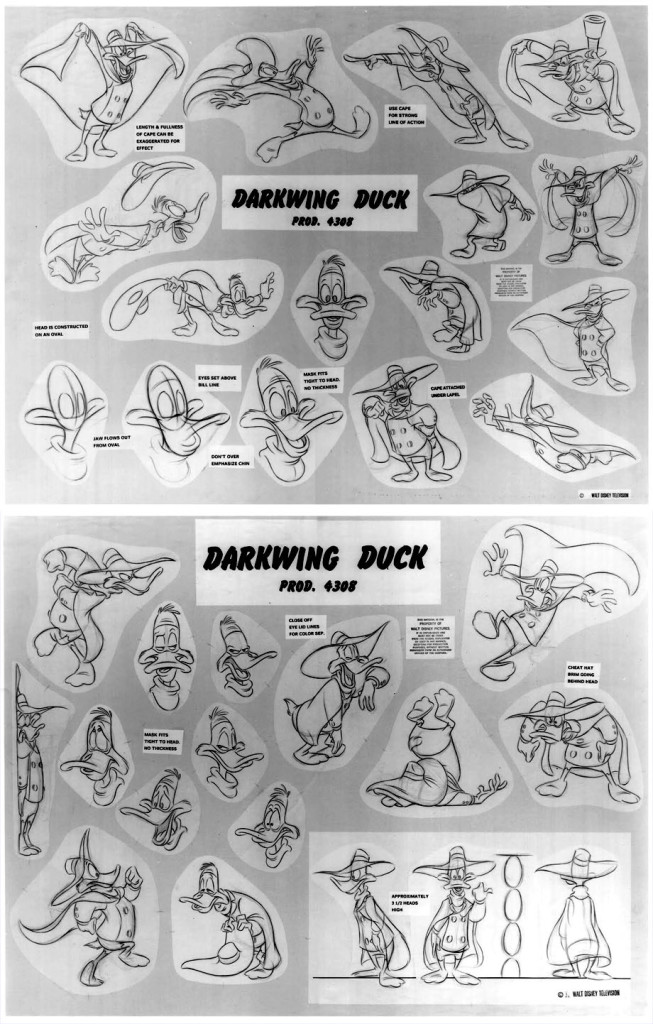
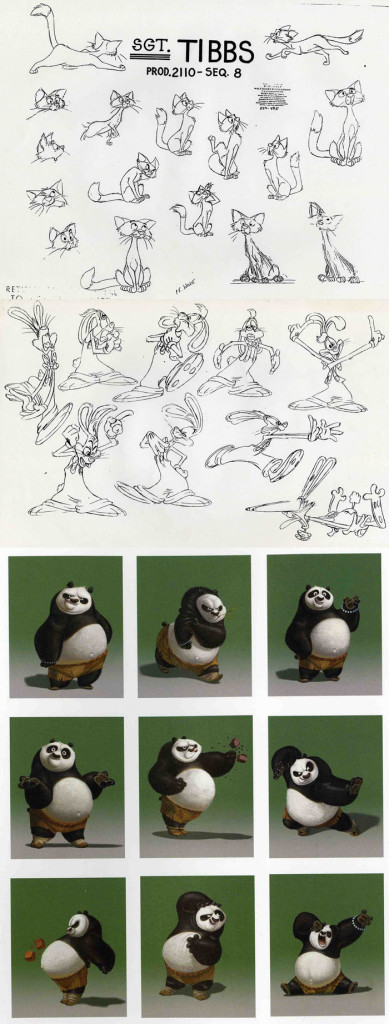
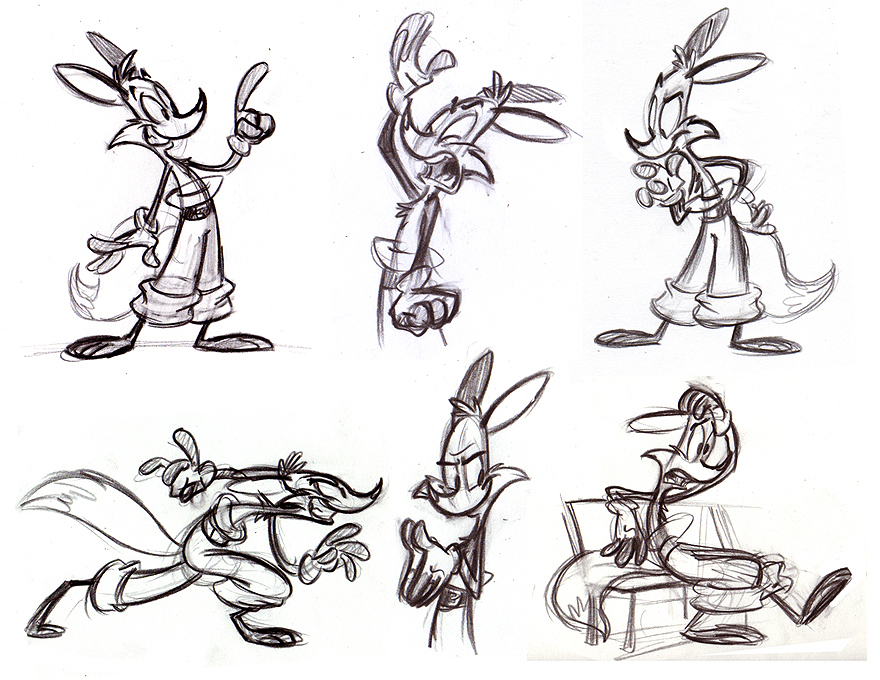
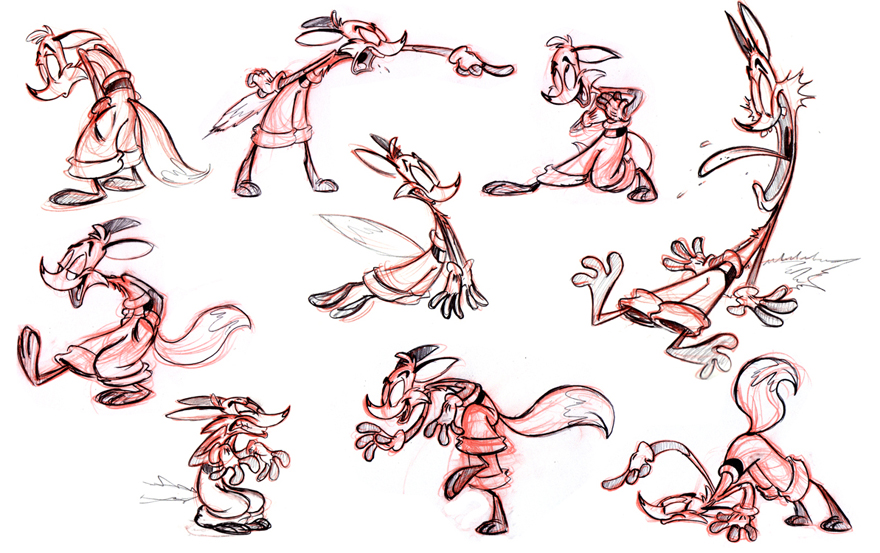
Models/Character Design- Whether you are animating a story or shooting a live-action film developing your character is of upmost importance. A well developed character will allow your audience to connect with your story and to get lost (in a good way) in your story.
You should have created a story outline and a short character description in the last project. Now expand a little more on your character and draw them!
If you are inexperienced in drawing feel free to use the handouts provided to help you draw. Its ok if your drawings are simple!
Use reference material (google search, etc) to help you draw.
Think about how much easier it will be to cast your actor if you have some drawings of what they ‘should’ look like.
You may want to watch videos (youtube) to help you as well.
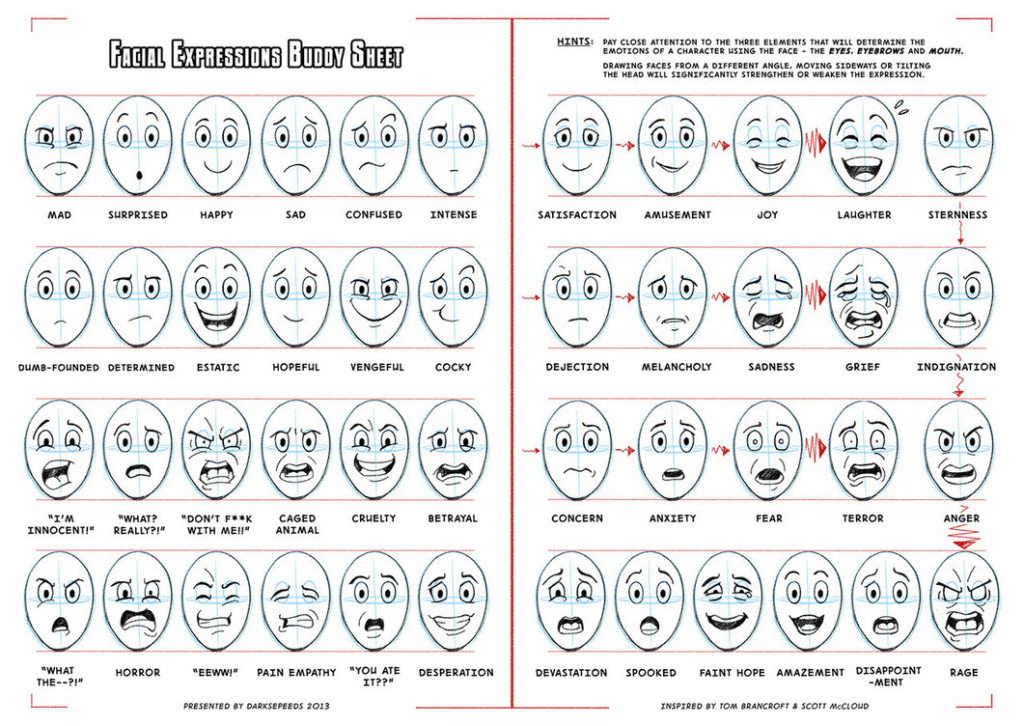
Use a mirror! Take a selfie to see your expressions.
Start a folder called MODELS and collect images to help you create your character.
Props- Are there any special props in your story? A magical item? A specific vehicle? What ‘stuff’ is important in your story. If your character drives a car, what kind of car is it? If they use a cellphone, what kind of cellphone? Think of this now!
Start a folder called PROPS and collect images to help you draw and plan your props.
Backgrounds- Where does your story take place? What time period? What country? What is the weather like? What kind of ‘stuff’ is in your character’s house? Think of this now!
Start a folder called BACKGROUNDS and collect images to help you draw and plan your backgrounds.
Couple shots to consider in your roughs
Master Shot – A wide shot that contains all the important elements for a scene. This shot can be re-used anytime you need to re-establish the scene and placement. Some of your stories may require a few master shots.
POV shot – (Point of View)
1. A character looks at someone/something
2. The person/object they are looking at is shown
3. We see the character again and their reaction
Truck Out – Use this to reveal something that was hidden.
*we will talk more about shots next week
Resources:
Heads/Faces/Expressions:
Drawing_heads_ball_and_plane_method
Drawing_heads_multiple_ball_methods
Characters:
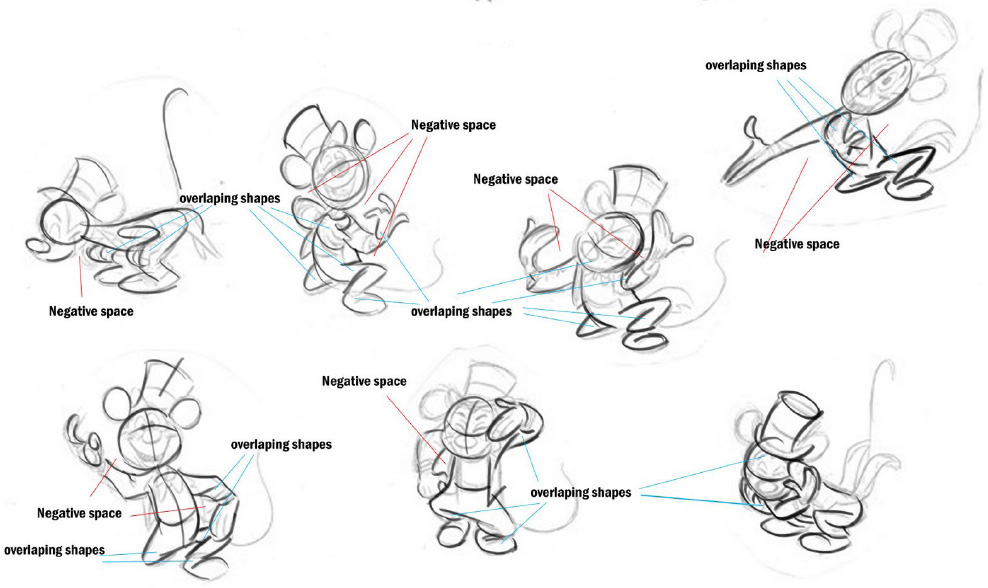
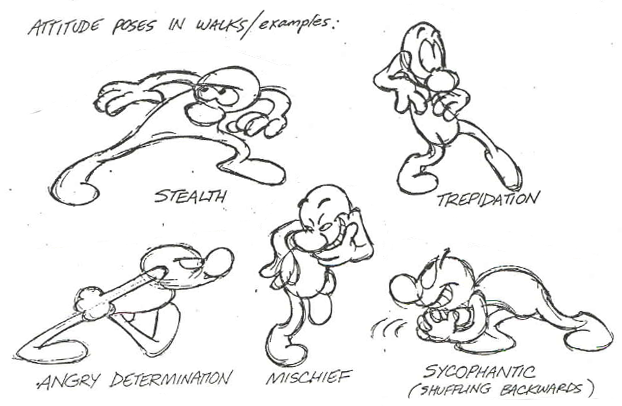
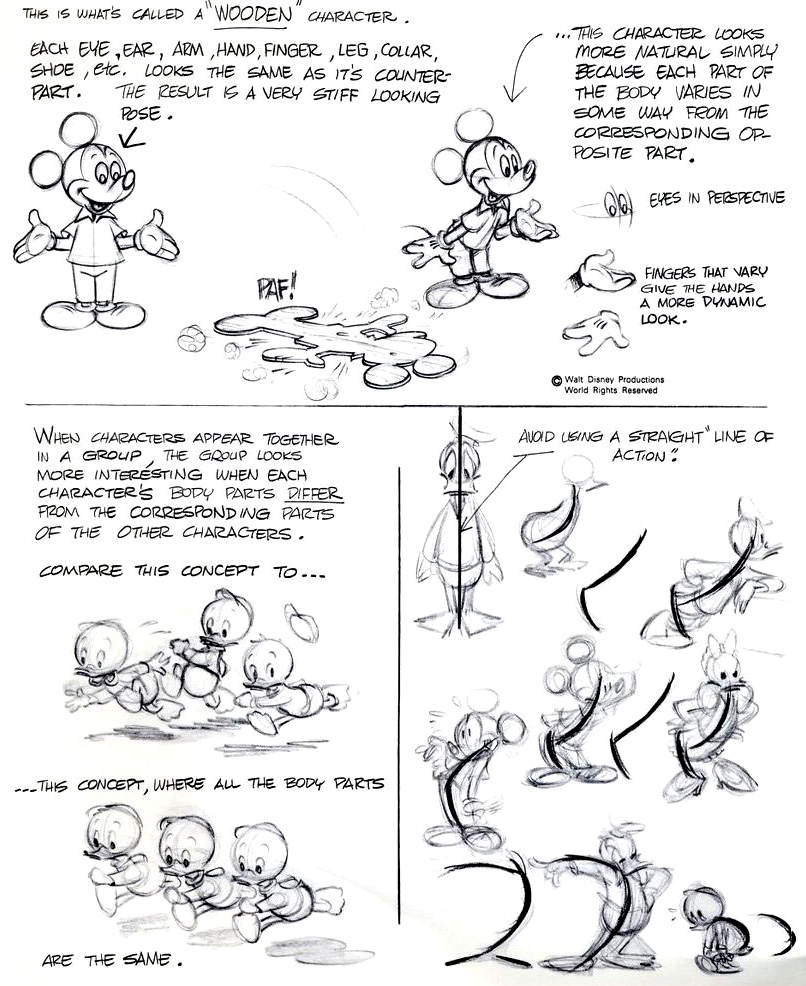
Character Design Handout – Character Design
Use a measuring system – 9 heads (or your own system)
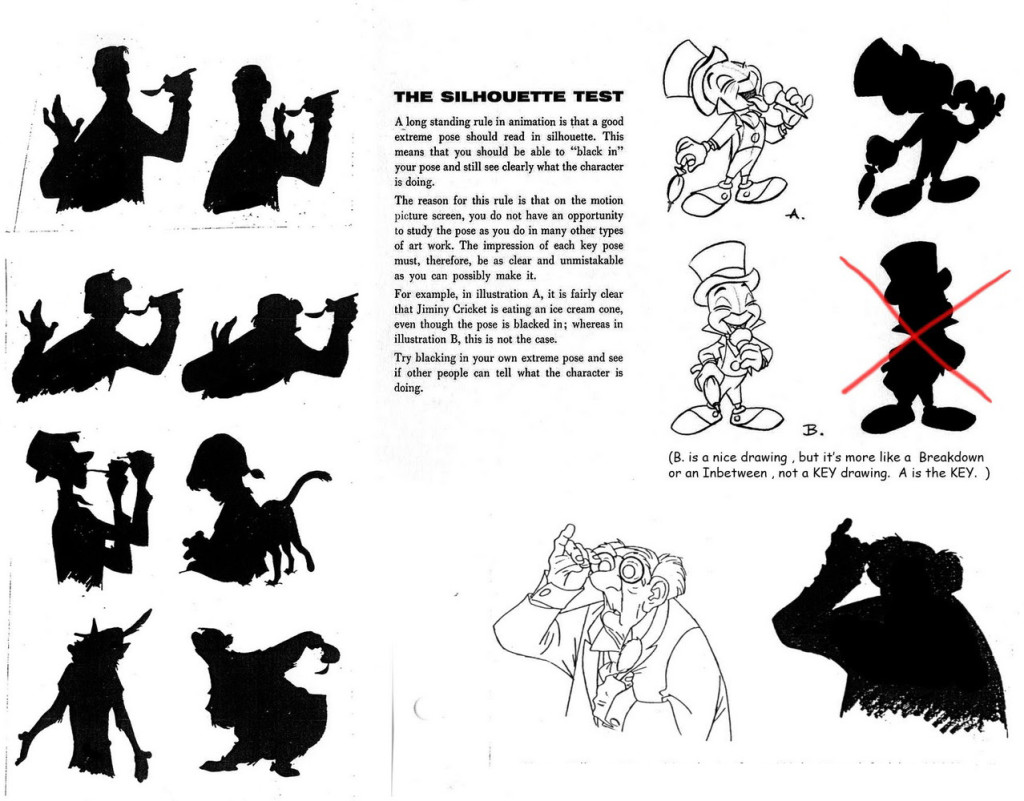
Think about ‘line of action’ ‘arc’ ‘movement’ and ‘silhouette’
anatomy_and_head_measurment_systems