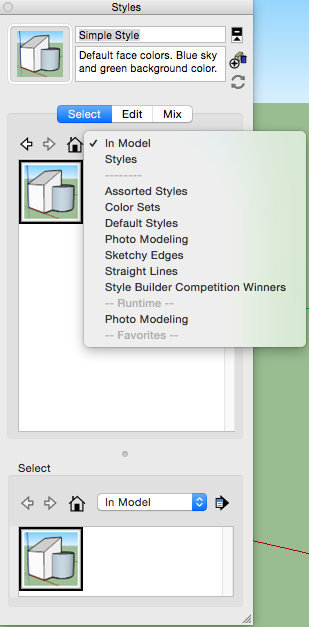
The Styles Window in Sketchup can be used to modify the look of your sketchup project.
Use the styles window to set up 2D Graphic Exports to send to Photoshop and then composite the images.
Steps:
1. Set up camera views in your project.
2. Choose one of the views.
3. Create 3 versions of this view using the Styles Menu. Save the Styles as you go.
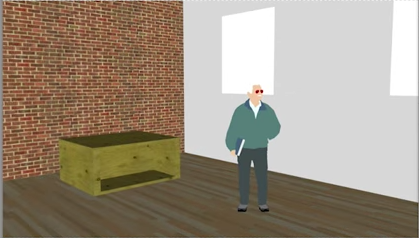
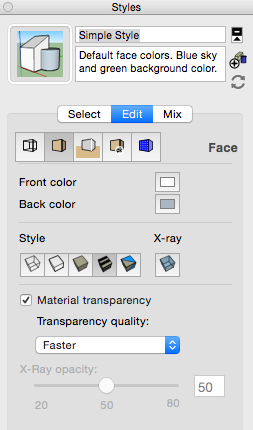
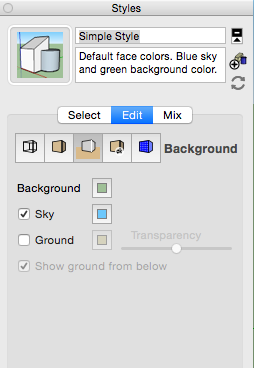
1st version, No Edges- No Edges, White Background, White Sky, No Guides, No Model Axes. Export to 2d Graphic, adjust options to create desired size.
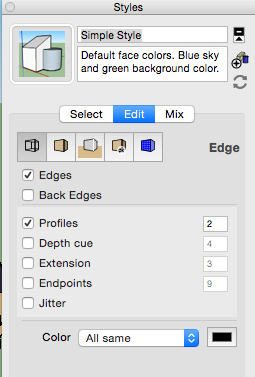
2nd version, Edges Only – Use the Styles>Face Menu to choose the Display in Hidden Line Mode icon (second box from left), you may need to go to the Edges menu and add Profiles if you have lots of round shapes. Export to 2d Graphic, adjust options to create desired size.
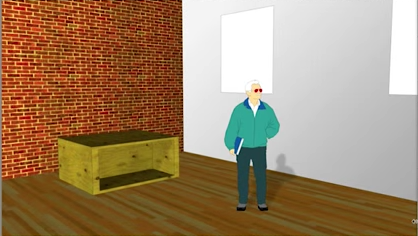
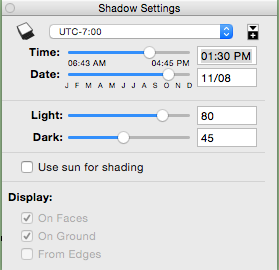
3rd Version, Shadows Only – Turn on Window>Shadows, leave the UTC option as is, move the Time and Date sliders to get your best lighting. Now go back to Edges menu and remove the lines. Export to 2d Graphic, adjust options to create desired size.
4. Open Photoshop and create a new document in your desired size (letter size, landscape, 300dpi, rgb, NO artborads)
5. Place the images you created and stack them on top of each other – No Edges, Edges Only, Shadows Only
6. Turn off the visibility of the layers (eyeball) and turn on the No Edges layer first and adjust Hue&Saturation, Levels to make the image less dull.
7. Turn on the Edges Only layer and choose MULTIPLY from the Blending Modes. You can now make this layer a Smart Object. Add a layer mask to hide lines. Add a Blur filter to soften the lines.
8. Turn on the Shadow Only layer and choose MULTIPLY from the Blending Modes. You can now make this layer a Smart Object. Add a layer mask to hide lines. Add a Blur filter to soften the lines.
9. You are done! Optional – Add any additional layer adjustments, Add additional layer masks, Add Additional textures.
Watch my tutorial here
Photoshop Lighting-
Lighting Filter
Command A – Select All
Edit Copy Special > Copy Merged
Deselecting – Command D
Edit Past Special > Paste in Place
Convert the top layer to Smart Object
Go To Filter> Render > Lighting Effects
Add lights, Adjust the Color, Hotspot and Ambiance
Use Gradient Lighting
Create a new empty layer
Use the Rectangular Marquee Tool to make a selection for the ‘path of your light’
Use the Gradient Tool to make a ‘color to transparent’ in side the Selection you made
Use Blending modes and Opacity to Adjust the lighting
Use Gradient to create a ‘Vignette’ effect
Create a new empty layer
Use the Gradient Tool to make a ‘Black to White’ Gradient
Apply the Gradient to your empty layer
*You may need to click the Reverse button on the gradient so BLACK is in the center
Change the mode to MULTIPLY to see the Vignette!
Inspiration
Look at these examples of finished renderings from profession and student artists
http://www.cgarchitect.com/search/index/content/recent/sketchup/3