PROJECT: 3d_Modeling_From_Refernece
Some shortucts we will use in this practice:
4- wireframe mode
5- shaded mode
Shift + Right Click when in Object mode opens up the polygon mesh tools
Setting up a project (the correct way!)
Create a folder on you desktop call it Modeling_Reference_Project
File > Project Window
Click New
My_Modeling_Reference_Project
choose the Folder you created on your desktop.
Select Accept
Now go back to your desktop and look at the folder. Maya should have created a bunch of sub folders.
Add the FRONT and SIDE images to the Source Images folder in your project
Adding Images to Maya Viewports:
Front View port: View Image Plane > Import Image > pick the FRONT IMAGE
Side View port: View Image Plane > Import Image > pick the Side IMAGE
Use the select tool and MOVE to set the images on the ground plane.
Now go to Channel Box and Hit the last button in the Layers section
Name it, save it.
Click the space next to the V and P to make it go R this will lock the layers.
Create Polygon Primitive Cube
*turn off interactive so the cube so that the cube is exactly in the center
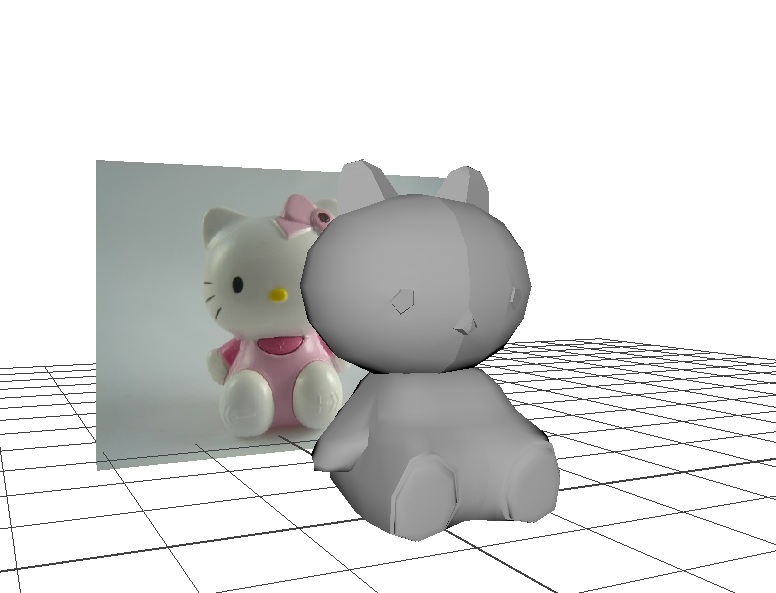
*For this project we will only worry about ONE side of the model because we will use the MIRRORING FUNCTION LATER 🙂
Modeling:
Front View:
use the move tool to align the cube with the your reference image
hit 4 to set it to WIREFRAME MODE
SHIFT+RIGHT Click to find the INSERT EDGE LOOP TOOL
*this will add edge loops wherever you need to help sculpt the body
Add Edge loops at places where the body changes and body parts extrude
Press Q to exit edge loop mode
Use the Multi Cut tool, the Slide Edge tools, Bevel, Extrude, Target Weld and other tools to get your model looking correct!
Side View:
Repeat the same steps above for the side view
Optional- Deleting half and making and Instance:
Once you are done with the object
Now Go to object mode
*if needed – Shift+right click and Choose SMOOTH!
Delete half of the model away.
*turn on snap to grid to make sure you cut exactly in half, you may need to move the vertex poins
*once you are done turn off snap to grid
Select the half you want to keep.
Edit> Duplicate Special and hit the option square
Geometry type: Instance (this make the second half a twin)
in SCALE: add -1 in the first box
Hit Duplicate Special
*note this is only if you want both sides to know be twins
**also i noticed a bug when doing this – my instance disappeared- its a known issue on message boards, Going to Edit>Delete by Type> History is supposed to help
Now any changes you make to one side will be reflected on the other
You may want to select this completed part and make a new layer.
Continue these steps until you are finished!
GREAT Tutorial on Modeling from a Reference: VIDEO
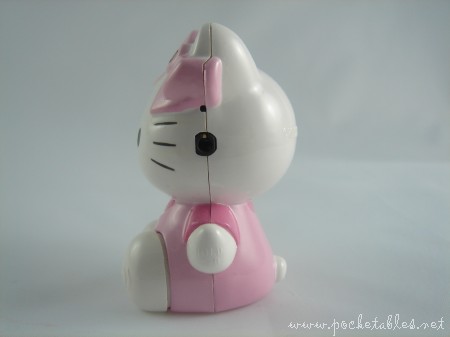
Reference Images (you don’t have to use these):